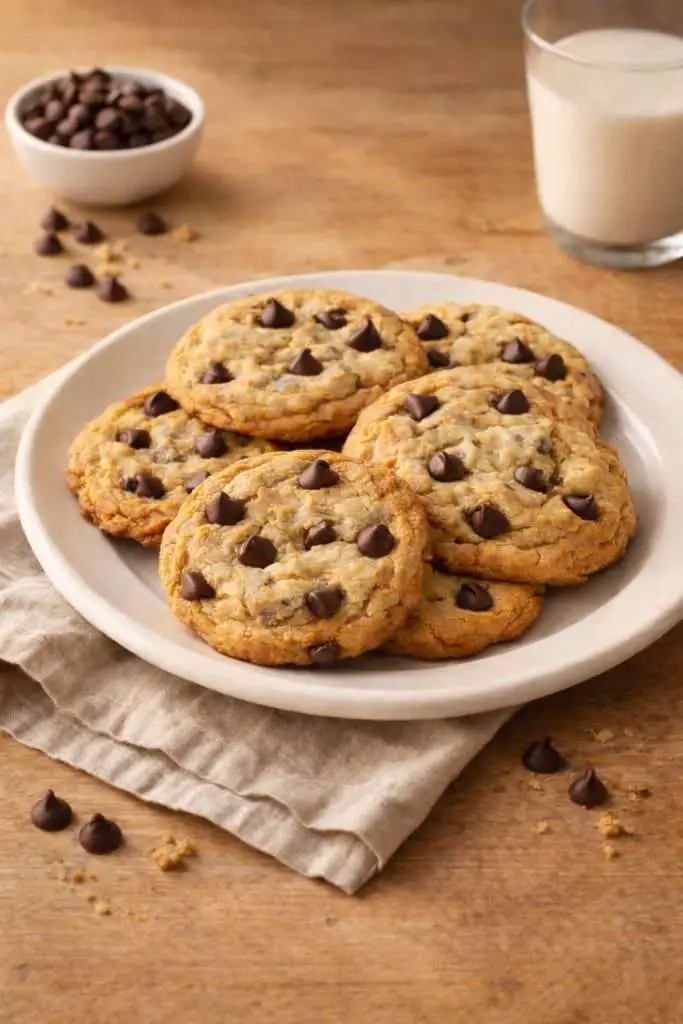
Nothing beats a warm tray of homemade chocolate chip cookies cooling on the counter. The smell of butter and vanilla, the golden edges, and the soft center with melted chocolate chips is the kind of classic comfort dessert that never goes out of style. This is the recipe you bake when you want that familiar, traditional cookie flavor with a texture that feels just right.
Unlike thick bakery-style cookies, this version is all about balance. You get cookies that spread just enough to create crisp edges, while the middle stays soft and tender. The dough is easy to work with, the ingredients are simple pantry staples, and I included the exact visual cues that tell you when the cookies are done so they stay soft instead of drying out.
These classic chocolate chip cookies are perfect for bake sales, after-school snacks, potlucks, holiday cookie trays, and those nights when you just want something sweet that is guaranteed to turn out. You can bake the dough right away without fuss, and with a few small technique tips, you will get consistent results every time.
Why You’ll Love These Homemade Chocolate Chip Cookies
- Perfect for parties, lunchboxes, and everyday treats
- Classic homemade flavor with buttery vanilla notes
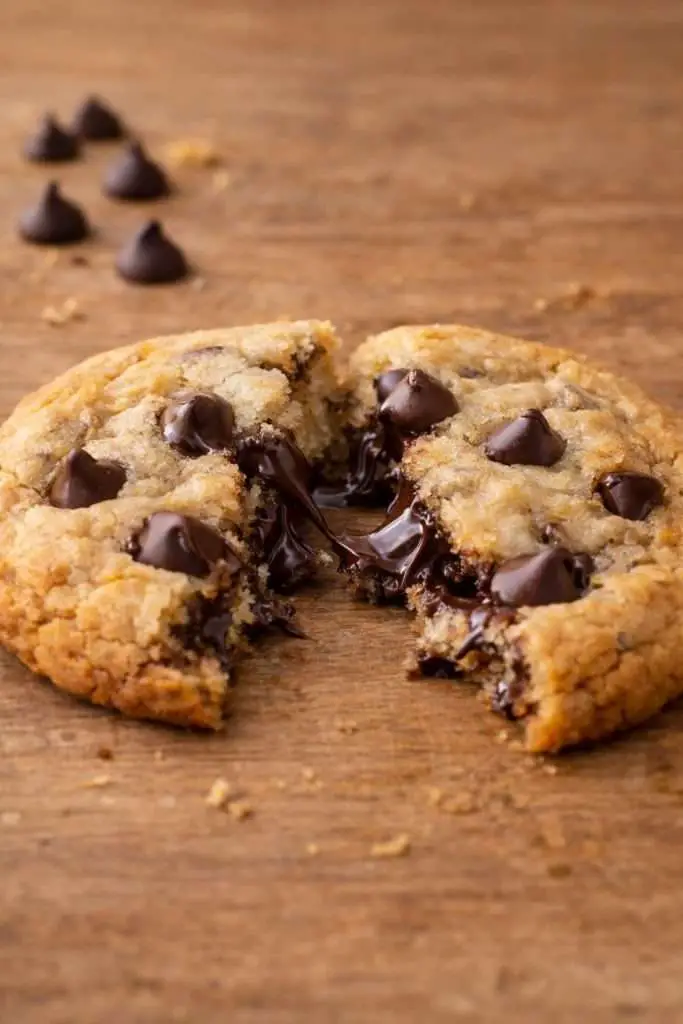
- Crisp golden edges with soft, tender centers
- Easy recipe with simple pantry ingredients
- No complicated techniques or special equipment required
- Baking cues included so cookies never turn dry
- Works with chocolate chips or chopped chocolate
Expert Tips for the Best Homemade Chocolate Chip Cookies
- Butter temperature matters. Use softened butter that still feels cool to the touch. Butter that is too warm makes cookies greasy and flat.
- Do not overmix the flour. Mix just until you do not see streaks of flour. Overmixing makes cookies tougher and more bread-like.
- Use parchment paper for even browning and easier cleanup. Silicone mats can sometimes increase spreading.
- Bake for texture, not color. Edges should be set and lightly golden, but centers should still look slightly soft.
- Let them cool on the tray first. Cookies finish setting as they cool, which helps the middle stay soft.
Quick Troubleshooting
- Cookies too flat: butter too warm or dough too soft. Chill dough 20 minutes before baking.
- Cookies too thick and dry: too much flour. Spoon flour into the cup and level it.
- Cookies too pale: oven temperature may be low. Use an oven thermometer if possible.
- Chocolate sinks or clumps: stir chips in gently and do not overbeat dough.
Ingredients for Homemade Chocolate Chip Cookies
- 2 1/4 cups (280 g) all-purpose flour
- 1 tsp baking soda
- 1/2 tsp fine salt
- 3/4 cup (170 g) unsalted butter, softened (cool room temperature)
- 1/2 cup (100 g) granulated sugar
- 3/4 cup (150 g) packed light brown sugar
- 2 large eggs, room temperature
- 2 tsp vanilla extract
- 2 cups (340 g) semi-sweet chocolate chips
Optional add-ins (choose one):
- 1/2 cup chopped walnuts or pecans
- 1/4 tsp cinnamon for warm flavor (subtle but good)
How to Make Homemade Chocolate Chip Cookies
Step 1: Prep the oven and pans. Preheat oven to 350°F (177°C) and line two baking sheets with parchment paper. A common mistake is putting dough on a hot tray from a previous batch, so let baking sheets cool completely between rounds to avoid extra spreading.
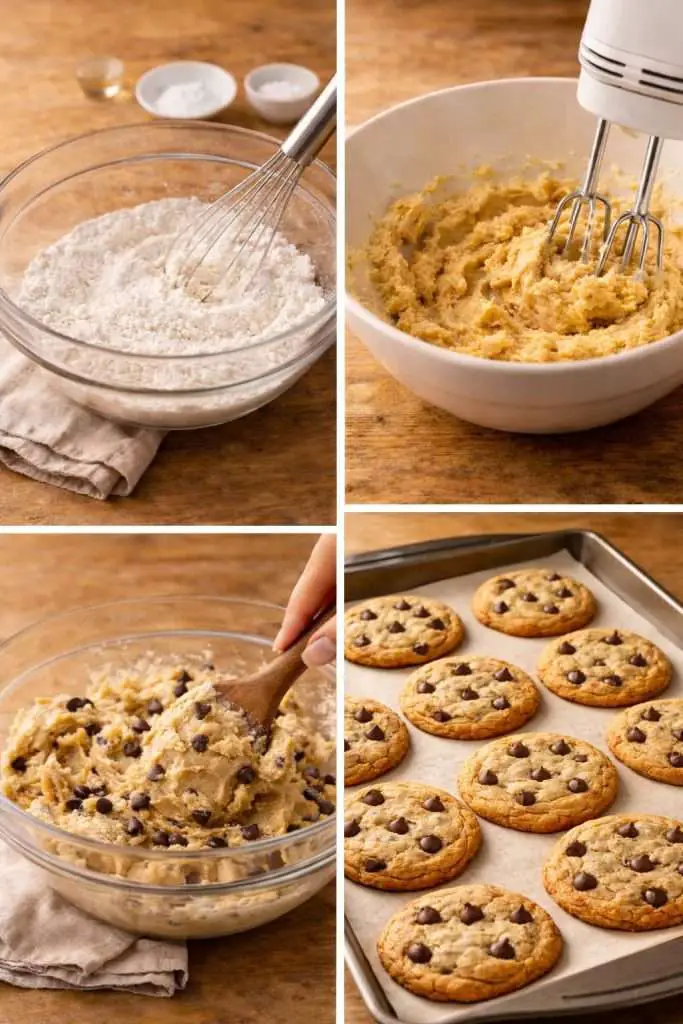
Step 2: Mix the dry ingredients. In a medium bowl, whisk the flour, baking soda, and salt until evenly combined. The visual cue is a uniform flour mixture with no streaks of baking soda, which helps cookies bake evenly.
Step 3: Cream butter and sugars. In a large bowl, beat butter, granulated sugar, and brown sugar for about 2 minutes until light and fluffy. You are looking for a creamy, slightly lighter mixture, not oily or separated, so stop once it looks smooth.
Step 4: Add eggs and vanilla. Beat in the eggs one at a time, then mix in vanilla until combined. The mixture should look glossy and smooth, and the biggest mistake here is overbeating, which can make cookies puff too much and then collapse.
Step 5: Combine into cookie dough. Add dry ingredients to the wet ingredients and mix just until no flour remains. The dough should be soft and thick, and it should hold its shape when scooped, not pour or smear.
Step 6: Add chocolate chips. Fold in chocolate chips until evenly distributed. Mix gently so the dough stays tender and the chocolate does not get crushed into the batter.
Step 7: Scoop the dough. Scoop dough into 2-tablespoon mounds and place on the baking sheet about 2 inches apart. For even-sized cookies, a scoop helps, and it prevents accidentally making some cookies overbake while others stay underdone.
Step 8: Bake and cool. Bake for 10 to 11 minutes until edges are set and golden, but centers still look slightly soft. Cool on the baking sheet for 10 minutes, then transfer to a rack so the cookies finish setting while staying soft in the middle.
Storage Tips for Homemade Chocolate Chip Cookies
- Room temperature: Store cooled cookies in an airtight container for up to 4 days. For softer centers, keep them tightly sealed and avoid leaving them exposed to air on the counter.
- Keep cookies soft: Add a small piece of bread in the container (not touching the cookies). It helps maintain moisture so the cookies stay tender.
- Freezer (baked cookies): Freeze in a freezer bag or container for up to 2 months. Thaw at room temperature, then warm one cookie for 8 to 10 seconds if you want that just-baked softness.
- Freezer (cookie dough balls): Scoop dough into balls and freeze on a tray until firm. Store in a bag and bake from frozen, adding 1 to 2 minutes to bake time.
FAQs About Homemade Chocolate Chip Cookies
The biggest difference comes from using real butter, brown sugar, and enough salt to balance sweetness. Vanilla extract also adds depth and makes the cookie flavor taste “full” instead of flat. Baking the cookies just until the centers are still soft keeps the texture tender, which makes them taste fresher longer. Using a mix of chips and chopped chocolate can also improve flavor.
The secret is baking just long enough for the edges to set while the middle still looks slightly underdone. Brown sugar helps keep centers soft because it holds moisture. You also want the dough slightly thick and scoopable, not runny. Cooling on the tray for 10 minutes finishes the set without drying the middle.
Flat cookies are usually caused by butter that is too warm or dough that was mixed too long. Warm butter melts too fast in the oven before the cookie structure sets, which makes cookies spread and thin out. Let butter soften but stay cool to the touch, and if needed, chill dough for 20 minutes. Also check that your baking soda is fresh.
Chilling is not required for this recipe, but it can help if your kitchen is warm or you want slightly thicker cookies. Even a short chill can improve texture and reduce spreading. If your dough feels very soft or sticky, chilling for 20 to 30 minutes makes it easier to scoop. If your cookies are already spreading well and baking evenly, you can bake right away.
Look for edges that are set and lightly golden, while the centers still look soft. If the whole cookie looks fully browned, it is likely overbaked and may turn crunchy once cooled. Cookies continue baking on the hot tray after they come out of the oven. For the best soft centers, pull them slightly early.
Freezing cookie dough balls is one of the best ways to bake cookies quickly later. Scoop dough first, freeze on a tray until firm, then store in a freezer bag. Baking from frozen works well and keeps the cookies thick. Add 1 to 2 minutes to the bake time and watch for golden edges.
Dry cookies often come from too much flour or baking too long. Measuring flour incorrectly is common, so spoon flour into the cup and level instead of scooping. Overbaking is the other major cause, especially when you wait for the centers to look fully done. Pull cookies when the centers are still soft and they will set properly as they cool.
You can, but it changes the texture and usually creates flatter cookies. Melted butter makes dough looser, which increases spreading and can reduce the soft center effect. If you want classic cookies with crisp edges and tender middles, softened cool butter is the best option. If you use melted butter, chilling dough becomes much more important.
Chocolate chips hold their shape and distribute evenly, which gives that classic cookie look. Chopped chocolate or chunks melt more and create gooier pockets. For the best texture, use mostly chips with a small portion of chopped chocolate mixed in. Avoid very fine chopped chocolate because it can melt into the dough and make cookies look greasy.
Air is what makes cookies hard, so airtight storage is key. Let cookies cool fully, then store in a sealed container as soon as possible. If they start to firm up, add a piece of bread to the container to help maintain moisture. For longer storage, freezing works better than refrigerating baked cookies.

Related Posts / More Easy Cookie Recipes to Try Next
If you love classic cookies as much as I do, here are a few more favorites to bake next:
- Soft & Chewy Classic Chocolate Chip Cookies (bakery-style version)
- Delicious Peanut Butter Cookies (easy and nostalgic)
- 3 Ingredient Shortbread Cookies (buttery 3:2:1 ratio)
- Easy Buttery Pecan Snowball Cookies (holiday tray favorite)
- Triple Chocolate Cookies (rich chocolate lovers cookie)
- Easy Alfajores Cookies (dulce de leche sandwich cookies)
- Red Velvet Cookies with White Chocolate Chips (festive and fun)
- Cherry Icebox Cookies (Slice and Bake Cookies)
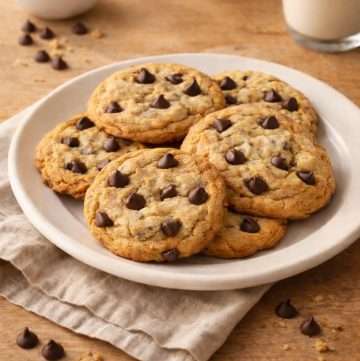
Homemade Chocolate Chip Cookies
Equipment
- Mixing bowls
- Hand Mixer or Stand Mixer
- Measuring Cups and Spoons
- Rubber spatula
- Baking sheets
- Parchment Paper
- 2 tablespoon cookie scoop
- Cooling rack
Ingredients
- 2 1/4 cups 280 g all-purpose flour
- 1 tsp baking soda
- 1/2 tsp fine salt
- 3/4 cup 170 g unsalted butter, softened (cool room temperature)
- 1/2 cup 100 g granulated sugar
- 3/4 cup 150 g packed light brown sugar
- 2 large eggs room temperature
- 2 tsp vanilla extract
- 2 cups 340 g semi-sweet chocolate chips
Optional add-ins (choose one):
- 1/2 cup chopped walnuts or pecans
- 1/4 tsp cinnamon
Instructions
- Preheat oven to 350°F (177°C) and line two baking sheets with parchment paper. A common mistake is putting dough on a hot tray from a previous batch, so let baking sheets cool completely between rounds to avoid extra spreading.
- In a medium bowl, whisk the flour, baking soda, and salt until evenly combined. The visual cue is a uniform flour mixture with no streaks of baking soda, which helps cookies bake evenly.
- In a large bowl, beat butter, granulated sugar, and brown sugar for about 2 minutes until light and fluffy. You are looking for a creamy, slightly lighter mixture, not oily or separated, so stop once it looks smooth.
- Beat in the eggs one at a time, then mix in vanilla until combined. The mixture should look glossy and smooth, and the biggest mistake here is overbeating, which can make cookies puff too much and then collapse.
- Add dry ingredients to the wet ingredients and mix just until no flour remains. The dough should be soft and thick, and it should hold its shape when scooped, not pour or smear.
- Fold in chocolate chips until evenly distributed. Mix gently so the dough stays tender and the chocolate does not get crushed into the batter.
- Scoop dough into 2-tablespoon mounds and place on the baking sheet about 2 inches apart. For even-sized cookies, a scoop helps, and it prevents accidentally making some cookies overbake while others stay underdone.
- Bake for 11 minutes until edges are set and golden, but centers still look slightly soft. Cool on the baking sheet for 10 minutes, then transfer to a rack so the cookies finish setting while staying soft in the middle.
Notes
- For crisp edges, bake until the outer ring is golden brown but the center still looks soft.
- If cookies spread too much, chill dough for 20 minutes and bake on a cool tray.
- Store cookies airtight so the centers stay soft.

Leave a Reply